I decided I wanted to make bookshelves in our living room. On one of our stranger walls. It is 1 m wide, 3 m high and after 1.5 m up it slowly starts to extend to the right, over our desk and maps.
This is the result - "floating" book shelves:

What you'll need:

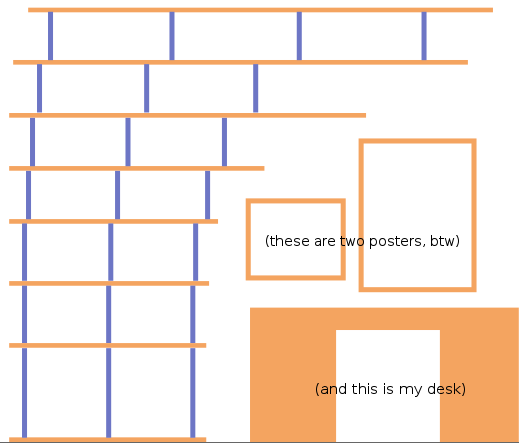
The weight of the books is not carried by the connections to the wall. Instead the whole structure rests on the floor and each shelf is carried by pillars. Since these pillars define the height between the shelves, I used slightly higher pillars at the bottom (for the bigger and heavier books) then at the top (novellas, pockets, ...). My shelf stack (distance between shelves from bottom to top) is as follows: 50 / 32 / 32 / 27 / 27 / 27 / 27 cm, which roughly covers the sizes of our book collection, taking into account that the lengths of the shelves and therefore the length of the pillars increase as we go up:

This is the messed up part of the job, and good tools (bench saw/"zaagbank" and column drill/"kolomboor") will help you enormously! I don't have them, so I used blood, sweat and tears to get it done (hand saw and hand drill). From some 3 cm diameter wooden rods, saw pillar pieces, enough to put them at a distance of around 50~80 cm apart between the shelves:

For each pillar piece, cut one spacer piece of 5 cm. So, if you need to make 20 pillars in total, also make 20 spacers (plus a few more just in case):

Holes need to be drilled into the spacers for attaching them to the wall and to the shelves. First we drill a hole through the center of the spacer of a few mm thick that allows a screw to go through it without breaking the spacer (I'd go for 4 mm). Then, since the spacers are connected to the shelves with dowel pins ("duvels"), a 10 mm hole of 2.5 cm deep is drilled into the spacer from one end. The next picture will show you why you need these holes (top: dowel, spacer front, spacer bottom, screw, plug / bottom: assembly):

Into the pillars, you only need to drill holes for dowel pins, since they connect the pillars to the shelves. The shelves are only ~3 cm thick and we need to allow the dowel pins to go in from both sides, so I allow them to go into the shelves only for 1 cm, and since I have 4 cm long pins, I drill 10 mm holes into the center of both pillar ends of 3 cm deep.
Using the dowel holes in both pillars and spacers, I mount them upright on a painting rig, that I made from a leftover piece of wood, into which I drilled 1 cm deep 10 mm holes. This made painting a lot easier! You guess what comes next? Painting. Make it any color you like - I liked to paint it the color of the wall. For the spacers I'd definitely recommend going for the same color as the wall, since it makes the whole structure blend into the wall, giving a nice floating-effect.

These shelves can be mounted quite easily: Bottom up. Start by laying the bottom shelf on the ground (I attached it to the wall after construction, just for safety), put wood glue in the dowel pin holes, insert dowel pin and put the right pillars in place and insert dowel pins on top. Then, lay the next shelf on the pillars and mark the location where you should put the spacers to the wall. Remove the shelf and lay it aside. Attach the spacers to the wall by drilling holes in the wall that hold your plugs (in my case 6 mm), insert plug, insert the screw through the spacer and screw the spacer into the plug using the screw and a screw drill with extended-length bit. Put glue inside spacer and insert dowel pin into spacer. You are now in the situation where you have dowel pins "sticking out of the wall" at a 5 cm distance from the wall and dowel pins pointing up into the air.
Put glue on top of the vertical dowel pins and inside the edge-holes that go over the horizontal dowel pins. Position the shelf onto the dowels and press down and towards the wall to mount the shelf. To correct for mistakes in height, I made use of my imperfections in drilling holes into the spacers: by turning them around, I could adjust the height of the back edge of each shelf! Weirdly enough, my inaccuracies in drilling really gave me optimal positioning capabilities of the shelves.
And... this is what it looked like after mounting the last shelf:

This is the result - "floating" book shelves:

What you'll need:
- Wooden planks (I used scaffolding planks: 18~19 cm x 250 cm, 3 cm thick)
- Wooden rods, 3 cm thick
- Dowel pins, 10 mm x 4 cm
- Wood glue
- Screws and plugs (screws should be 2 cm longer than the plugs) for wall-mounting
- Optional: paint (for either/both spacers, pillars and shelves)
Step 1. Design
As I like to make stuff as cheap as possible while still looking awesome, I started with sourcing cheap wood. Since a few years, hipsters in Amsterdam are being 'creative' with scaffolding planks ("steigerplanken"), which come in lengths up to 3 m with a fixed width of a little less than 20 cm and which are generally made of spruce ("vuren") or pine ("grenen"). This'd make great wood for the book shelves, although the 20 cm (actually 18~19) is a bit shallow for the books I have (average depth of around 25 cm with outliers to over 35 cm). Therefore I decided to mount the shelves hanging off the wall by around 5 cm. That would cover the depth of most of the books and with the biggest atlases standing on the lowest shelf, that'd be well-sized. These 5 cm spacers are connected to both the wall and the shelves.
The weight of the books is not carried by the connections to the wall. Instead the whole structure rests on the floor and each shelf is carried by pillars. Since these pillars define the height between the shelves, I used slightly higher pillars at the bottom (for the bigger and heavier books) then at the top (novellas, pockets, ...). My shelf stack (distance between shelves from bottom to top) is as follows: 50 / 32 / 32 / 27 / 27 / 27 / 27 cm, which roughly covers the sizes of our book collection, taking into account that the lengths of the shelves and therefore the length of the pillars increase as we go up:

Step 2. Cutting and painting the pillars and spacers
This is the messed up part of the job, and good tools (bench saw/"zaagbank" and column drill/"kolomboor") will help you enormously! I don't have them, so I used blood, sweat and tears to get it done (hand saw and hand drill). From some 3 cm diameter wooden rods, saw pillar pieces, enough to put them at a distance of around 50~80 cm apart between the shelves:
For each pillar piece, cut one spacer piece of 5 cm. So, if you need to make 20 pillars in total, also make 20 spacers (plus a few more just in case):

Holes need to be drilled into the spacers for attaching them to the wall and to the shelves. First we drill a hole through the center of the spacer of a few mm thick that allows a screw to go through it without breaking the spacer (I'd go for 4 mm). Then, since the spacers are connected to the shelves with dowel pins ("duvels"), a 10 mm hole of 2.5 cm deep is drilled into the spacer from one end. The next picture will show you why you need these holes (top: dowel, spacer front, spacer bottom, screw, plug / bottom: assembly):

Into the pillars, you only need to drill holes for dowel pins, since they connect the pillars to the shelves. The shelves are only ~3 cm thick and we need to allow the dowel pins to go in from both sides, so I allow them to go into the shelves only for 1 cm, and since I have 4 cm long pins, I drill 10 mm holes into the center of both pillar ends of 3 cm deep.
Using the dowel holes in both pillars and spacers, I mount them upright on a painting rig, that I made from a leftover piece of wood, into which I drilled 1 cm deep 10 mm holes. This made painting a lot easier! You guess what comes next? Painting. Make it any color you like - I liked to paint it the color of the wall. For the spacers I'd definitely recommend going for the same color as the wall, since it makes the whole structure blend into the wall, giving a nice floating-effect.

Step 3. Cutting and drilling the shelves
I don't think this needs a lot of explanation, but here goes: Saw the planks into the desired lengths, round them off if you want, sand them down and if you like: paint them (I didn't). Then, from the schematic shelf diagram in one of the pictures above, decide where your pillars need to be placed on the shelves. If you have all the pillars at the same spots, you will have all pillars attached to the shelves from both sides, and on those spots you drill 10 mm holes all the way through. If you're going wild with the design (are you?) you might have spots where a pillar is attached to the shelve from only one side. There you can drill 10 mm holes of 1.5 cm deep. Then, also cut 10 mm dowel holes on the "wall edge" of the shelves, around 2.5 cm deep, the same amount as you have pillars on either side. Now get some coffee!Step 4. Mounting the structure onto the wall
I highly recommend to get someone to help you in this step, especially if you need to mount long shelves (> 1.5~2 m). Not so much for the weight, but more for the precision you need to get all the dowel pins into the holes at the same time.These shelves can be mounted quite easily: Bottom up. Start by laying the bottom shelf on the ground (I attached it to the wall after construction, just for safety), put wood glue in the dowel pin holes, insert dowel pin and put the right pillars in place and insert dowel pins on top. Then, lay the next shelf on the pillars and mark the location where you should put the spacers to the wall. Remove the shelf and lay it aside. Attach the spacers to the wall by drilling holes in the wall that hold your plugs (in my case 6 mm), insert plug, insert the screw through the spacer and screw the spacer into the plug using the screw and a screw drill with extended-length bit. Put glue inside spacer and insert dowel pin into spacer. You are now in the situation where you have dowel pins "sticking out of the wall" at a 5 cm distance from the wall and dowel pins pointing up into the air.
Put glue on top of the vertical dowel pins and inside the edge-holes that go over the horizontal dowel pins. Position the shelf onto the dowels and press down and towards the wall to mount the shelf. To correct for mistakes in height, I made use of my imperfections in drilling holes into the spacers: by turning them around, I could adjust the height of the back edge of each shelf! Weirdly enough, my inaccuracies in drilling really gave me optimal positioning capabilities of the shelves.
And... this is what it looked like after mounting the last shelf:

This comment has been removed by the author.
ReplyDeleteThe post you have shared here is really great as it contains some best knowledge aboutscrew plug used in houses. which is very useful for me. Thanks for posting it. Keep it up. eaton vfd
ReplyDeleteCasino City - JTM Hub
ReplyDeleteHotel in Las Vegas' South Tower Casino · 세종특별자치 출장샵 Casino Games in Las Vegas' South Tower Casino · Hotel Tower Casino in Las 수원 출장안마 Vegas' South Tower Casino · Restaurants in Las Vegas' South Tower Casino · 안산 출장마사지 Casino Games 논산 출장안마 in Las Vegas' South Tower Casino 부천 출장샵
Thanks greeat post
ReplyDelete